Los tapajuntas tienen el rol fundamental de drenar el agua de las zonas vulnerables de un techo. Si tienes una fuga, es un 95% probable de que esté en una parte del techo donde hay un tapajuntas.
Esos puntos donde están los tapajuntas en un techo son todas las partes en las que un faldón se une a una superficie vertical. En una vivienda residencial, esto podría ser donde el techo se conecta con la ventana de una bohardilla o a una chimenea. Para un techo comercial, los tapajuntas son necesarios donde el techo se une al parapeto de la pared y alrededor de todas las penetraciones del techo.
Colocar tapajuntas en las penetraciones en el techo, como las tuberías de ventilación, los tragaluces y las áreas del techo donde se conectan los planos, es crucial para prevenir fugas. Comprender el rol que desempeñan los tapajuntas y cómo funcionan para mantener tu vivienda o edificio sin fugas te ayudará a tomar las decisiones correctas al momento de repararlos o reemplazarlos.

¿Qué son los tapajuntas de techo y por qué son importantes?
Los tapajuntas de los techos son el héroe anónimo de todo sistema de techado, y tienen la gran misión de drenar el agua de las áreas vulnerables del techo, para garantizar que no haya infiltraciones al interior de la vivienda o el edificio.
El tapajuntas es un material delgado, en general de acero galvanizado, que se coloca donde el techo se une a superficies verticales o a otra parte del techo. Estas intersecciones deben tener tapajuntas para prevenir que el agua penetre por las hendiduras que pudieran existir en este tipo de uniones. El tapajuntas para techos ofrece un sellado eficaz en cualquier unión o penetración del techo (como una chimenea o respiradero) donde hay una intersección de dos superficies del techo o donde el techo se encuentra con una pared exterior.
El tapajuntas protege estas áreas actuando como barrera y como una forma de dirigir el agua hacia abajo y fuera del techo. Los contratistas instalan el tapajuntas cuando colocan tu sistema de techo, pero siempre puedes contratar a un profesional para agregar o mejorar el tapajuntas después de la instalación.
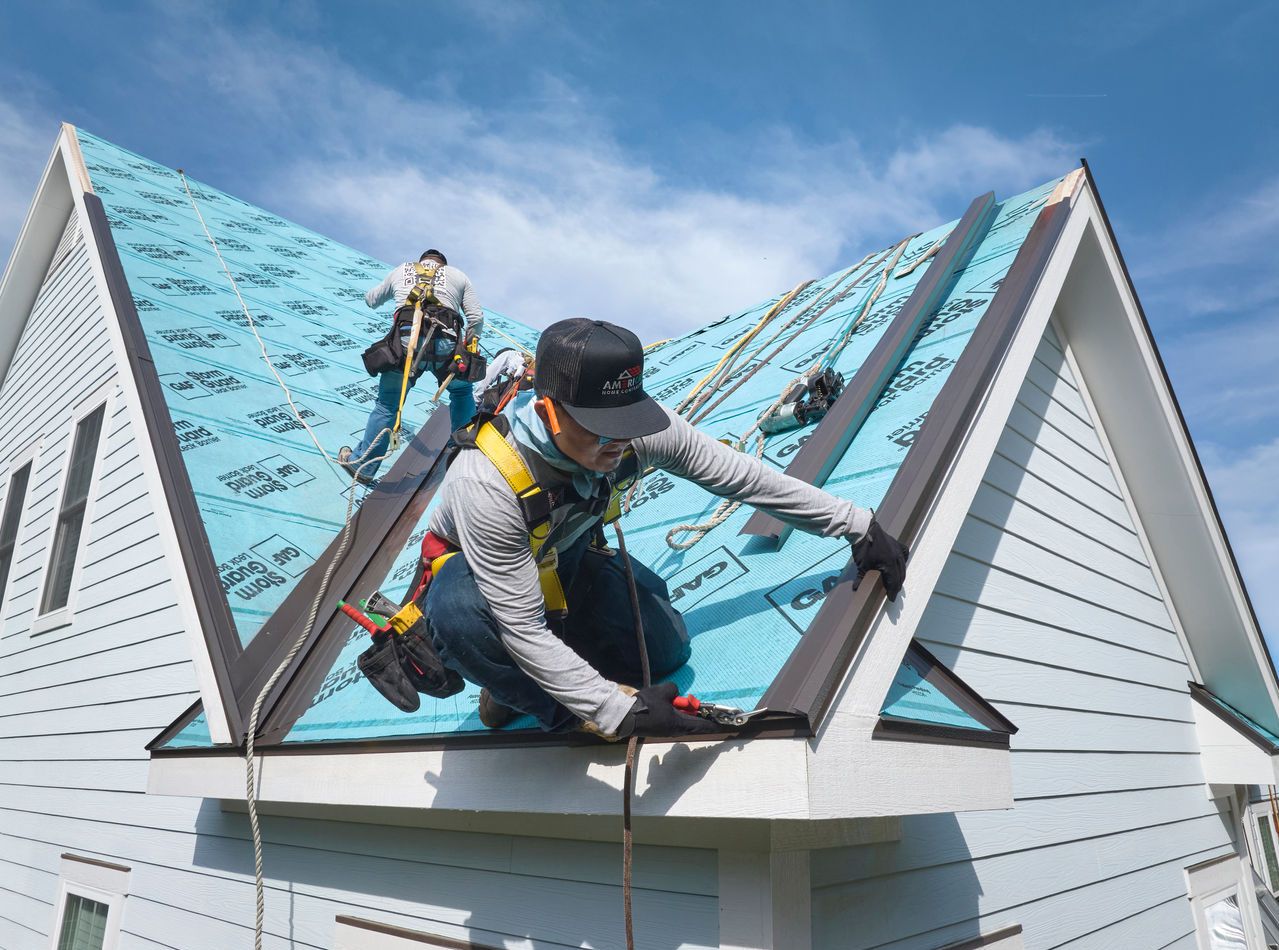
El tapajuntas de techo se coloca debajo del tejado, en una vivienda residencial, pero quedará visible ya que debe salirse unas pulgadas por sobre las superficies laterales, para garantizar que las intersecciones planas queden bien protegidas de la infiltración del agua.
Dónde es fundamental colocar tapajuntas: los puntos vulnerables
Las intersecciones del techo a la pared son una de las áreas más vulnerables de una vivienda o edificio. Si no se coloca un tapajuntas correctamente en estas áreas, el agua se infiltrará por la pared y no lo notarás hasta que haya grandes daños. Los tapajuntas metálicos utilizados en las uniones entre el techo y la pared generalmente se doblan en ángulo recto, de modo que un lado quede contra la pared y el otro se entrelace con las tejas o se instale debajo de ellas.
Los valles del techo son más comunes en las viviendas residenciales y tienen una canaleta en V donde se unen dos planos del techo. Esta es una zona muy crítica del techo, ya que las tejas conducen el agua hacia el punto más bajo, que es donde se unen los dos planos para formar el valle. El valle debe tener la capacidad de gestionar el agua que converge allí, para lo cual debe tener tapajuntas bien colocados, que drenen el agua del valle hasta sacarlo del techo. Si los tapajuntas no están bien colocados, el agua puede filtrarse por debajo de las tejas y buscar una salida hacia el interior de la vivienda, lo cual pudrirá la madera, acumulará humedad y ocasionará daños internos.

Las chimeneas pueden ser un lugar muy tentador para que el agua intente infiltrarse adentro de la casa. La infiltración de agua por los contornos de la chimenea es un problema grave que enfrentan muchos propietarios. Colocar el tapajuntas correctamente tiene sus trucos, ya que las chimeneas requieren la colocación de una barrera impermeable junto con el tapajuntas en la base, asegurados a la losa, y luego un tapajuntas del lado opuesto de la chimenea sellado con mortero. Los daños o las fallas en el vierteaguas de la chimenea son una de las causas más comunes de fugas.
Las tuberías de ventilación son otro punto vulnerable de tu techo. La ventilación es imprescindible, ya que todas las viviendas necesitan una vía de ventilación para que no se acumule humedad en el interior. Las tuberías de ventilación del techo suelen salir del baño de la vivienda, del secadero, o incluso de la cocina. En cada penetración que haya en el techo, es necesario colocar el tapajuntas correctamente para prevenir la infiltración de agua. El tapajuntas más común para las tuberías de ventilación es una especie de bota de goma que sale por encima de la tubería y queda bien sellada contra la tubería y las tejas.
Los tragaluces son otra vía fácil para que el agua penetre hacia el interior de la vivienda si no están bien sellados con tapajuntas. Los tragaluces pueden estar montados en el bordillo o sobre la plataforma base y, cualquiera sea el tipo de montaje, es necesario colocarles tapajuntas para garantizar un buen drenaje del agua, hacia afuera del tragaluz y del techo.
Las áreas del perímetro del techo como aleros, faldones y bordes verticales deberían usar tapajuntas en los bordes de goteo, para evitar que el agua se filtre por debajo de las tejas y provoque el deterioro de la plataforma de madera del techo. Los bordes de goteo ayudan a proteger la imposta y guían el agua hasta los desagües, para sacarla del techo y de la vivienda.
Guía completa de los tipos de tapajuntas de techo
Vierteaguas escalonado
Los vierteaguas escalonados son el tipo de tapajuntas más usado para las uniones de techo a pared y techo a chimenea. Las piezas en forma de L se colocan de manera escalonada y superpuesta. Cada pieza está doblada a un ángulo de 90 grados y tiene entre ocho y diez pulgadas de largo, lo cual deja una exposición de entre cuatro y cinco pulgadas en la pared y cuatro a cinco pulgadas debajo de las tejas.
La Asociación de fabricantes de techos asfálticos (ARMA) explica los tamaños en su manual para techos residenciales, donde se indica que el tamaño depende de la exposición de la teja. "Si se usan con tejas que tienen 5" de exposición, deben ser de al menos 10" x 7". El largo de 10" se dobla a 90 grados para pasar 5" por encima de la cubierta del techo y 5" por encima de la unión con la pared".
Cada pieza del vierteaguas escalonado se instala en los extremos de cada hilera de tejas, avanzando hacia la parte superior del techo a medida que se instala cada nueva hilera.
Tapajuntas para valles
Los tapajuntas para valles son un metal en forma de W que se instala donde se encuentran dos planos inclinados del techo. Este tipo de tapajuntas es vital para evitar fugas en áreas de alto riesgo, por donde pasan grandes volúmenes de agua. El estilo en W tiene una costilla central que evita que el agua pase del valle a otra pendiente del techo.

Hay dos estilos de tapajuntas para valle: valles abiertos y valles cerrados. Con los valles abiertos, el tapajuntas metálico queda visible. Este estilo es preferible cuando se instalan sistemas de techado de alta gama, como pizarra, metal o tejas de arcilla. Los valles cerrados son más comunes en techos de teja asfáltica, en los que las tejas cubren el metal y no se ve.
Contra tajapuntas y tapajuntas de la base
Los contra tapajuntas y los tapajuntas de la base forman un sistema de dos partes que trabajan juntas para evitar la infiltración del agua. Este tipo de tapajuntas es el más utilizado alrededor de las chimeneas para garantizar que el agua de lluvia impacte sobre el tapajuntas y que este la drene hacia abajo y lejos de la chimenea. El tapajuntas de la base, también conocido como tapajuntas frontal, se coloca en la parte inferior y el contra tapajuntas se coloca por encima del tapajuntas de la base, lo cual completa el sistema de tapajuntas.
Debido a que las chimeneas suelen tener cimientos independientes de la vivienda, este sistema de tapajuntas en dos partes permite un movimiento independiente durante la expansión y contracción que suele ocurrir, sin dejar de proteger al techo y la chimenea contra el agua.
Tapajuntas para borde de goteo y tapajuntas especiales
Los bordes de goteo se colocan a lo largo de los bordes verticales y los aleros para conducir el agua de la imposta hacia las canaletas, y evitar que se filtre por debajo de las tejas. Es un requisito del código de construcción para la mayoría de las áreas. Un beneficio adicional es que también ayuda a proteger el techo contra el viento.
ARMA explica la colocación del borde, indicando que "el borde de goteo debe estar fabricado con un material resistente a la corrosión que se extienda un mínimo de 2" (51 mm) sobre el contratechado y se prolongue hacia abajo al menos ¼" (6 mm) por debajo del contratechado".

El borde de goteo debe tener una brida doblada hacia fuera en el punto más bajo, lo que también se conoce como "kickout". De este modo, se garantiza que el agua sea dirigida hacia las canaletas, evitando que se desvíe hacia la imposta y la cubierta de madera que hay debajo de las tejas.
También existen otros tipos especializados de tapajuntas para garantizar que las penetraciones del techo, como los tragaluces y los respiraderos, sean impermeables y estén correctamente selladas para evitar la filtración de agua.
Materiales de tapajuntas para techo: guía de comparación completa
Hoy en día, la mayoría de los tapajuntas para techo está hecho de metal, como acero galvanizado, cobre y aluminio. Los tapajuntas metálicos pueden fabricarse previamente conforme a especificaciones generales o cortarse a medida para adaptarse a diseños de techo únicos.
Acero galvanizado
El acero galvanizado es el material más habitual de los tapajuntas para techo. Los contratistas lo prefieren porque tiene un aspecto atractivo, es moldeable y flexible y, al estar galvanizado, resiste la corrosión.
Este material es una de las opciones más rentables, con precios que, en promedio, varían entre $1.00 y $1.50 por pie lineal. El costo depende del grosor del acero, la cantidad comprada y el tipo de producto, ya que los perfiles especiales resultan más costosos que los estándar. Los costos de instalación también varían considerablemente, ya que factores como la complejidad y la pendiente del techo influyen en el precio.
La mayoría de los códigos de construcción residenciales exigen el uso de tapajuntas en chimeneas, valles, bordes de techo y uniones entre el techo y la pared, y también que sean resistentes a la corrosión, tengan un calibre mínimo de 26 y estén fabricados en acero galvanizado. Consulta siempre el código de construcción local del lugar donde se encuentra la vivienda, ya que los requisitos varían de una jurisdicción a otra.
El acero galvanizado tiene una vida útil de entre 20 y 30 años y, si se instala correctamente, no debería requerir mantenimiento durante el ciclo de vida del techo de asfalto.
Aluminio
El aluminio es otro material muy duradero, empleado habitualmente en los tapajuntas para techo en entornos exigentes, incluidas las aplicaciones en zonas costeras. Es muy resistente a la corrosión y al óxido, lo que lo convierte en una opción muy popular en las zonas costeras con aire salino. Además, es liviano, lo que facilita su transporte, y su flexibilidad lo convierte en una opción ideal para doblarlo directamente en el lugar.
El aluminio debe recubrirse para evitar reacciones químicas al entrar en contacto con el concreto o la mampostería, ya que esto puede provocar su degradación. El aluminio es más maleable que el acero, por lo que existe el riesgo de que se abolle con mayor facilidad.
En comparación con el acero, el aluminio suele ser una opción ligeramente más económica. Recuerda que los precios varían en función de factores como la cantidad comprada y los valores que el contratista pueda negociar con el proveedor. Los costos de instalación también varían en función de los factores mencionados anteriormente, como la pendiente y la complejidad.
Al igual que el acero, el aluminio tiene una vida útil similar, de entre 20 y 30 años, siempre que se instale correctamente.
Opciones de cobre y premium
El tapajuntas de cobre es una terminación de lujo que ofrece una protección duradera para cualquier vivienda. Es extremadamente resistente a la corrosión y aporta un atractivo estético a la vivienda, ya que con el paso del tiempo va adquiriendo su característica pátina protectora, cuyo color evoluciona de un marrón oscuro a un verde claro. Este tipo de tapajuntas se elige con frecuencia para chimeneas debido a su atractivo estético.
Además, su maleabilidad lo convierte en una opción ideal para aplicaciones a medida; a la vez, sus propiedades naturales inhiben el crecimiento de musgo y algas. Se trata de una solución para tapajuntas que requiere muy poco mantenimiento y que, si se instala correctamente, ofrece una vida útil notable de entre 80 y 100 años.
El cobre es la opción más costosa para los tapajuntas, con un precio que oscila entre $10 y $30 por pie lineal, dependiendo del tamaño, el calibre y la cantidad comprada.
El acero inoxidable es otro material de alta calidad para tapajuntas, ya que ofrece beneficios similares a las del cobre en cuanto a resistencia a la corrosión y durabilidad. Las piezas prefabricadas, como los bordes de goteo, no representan un costo significativamente mayor que los materiales estándar; sin embargo, los calibres más gruesos y los tapajuntas especializados sí resultan más caros.
Indicadores de que es necesario revisar los tapajuntas del techo
Aunque los tapajuntas del techo son duraderos, pueden deteriorarse con el tiempo o aflojarse y sufrir daños, lo que puede provocar filtraciones. Es una buena idea realizar una revisión anual para identificar problemas con el tapajuntas del techo y ayudar a prevenir posibles inconvenientes.
Puedes revisar el interior de tu techo desde tu ático y realizar una revisión exterior caminando por el perímetro de tu casa con unos binoculares, ¡pero no subas a tu techo! Eso es peligroso para ti y potencialmente dañino para tu techo también.
Dentro de la casa, revisa lo siguiente:
Filtraciones en tu casa, garaje o porche.
Manchas de agua en el cielo raso
Agua visible goteando por la parte posterior de la plataforma o de una chimenea en el espacio del ático
Manchas de agua en el ático
Luz del día que se filtra alrededor de los respiraderos o las tuberías del cielo raso en tu ático.
Desde el suelo fuera de tu casa, revisa para detectar lo siguiente:
Tejas sueltas, dañadas o faltantes
Tapajuntas sueltos, dañados o faltantes
Cualquiera de estos signos podría indicar un problema en el tapajuntas, o bien señalar otros inconvenientes que podrían estar causando filtraciones. De cualquier manera, si ves alguno de estos indicios, lo mejor es que un profesional revise tu sistema de techo de inmediato.

Instalación profesional o hacerlo uno mismo: lo que deben saber los propietarios
La instalación, reparación y reemplazo de tapajuntas exige conocimientos técnicos específicos que la mayoría de los propietarios no tiene, ni siquiera aquellos que suelen ocuparse de los proyectos de mejora en el hogar. No se recomienda hacer este trabajo por cuenta propia debido a muchas razones, entre ellas:
Seguridad. Trabajar en altura en un techo requiere una capacitación específica en materia de seguridad y equipo de protección contra caídas. Los contratistas profesionales conocen bien los peligros y siguen estrictas normas de seguridad que el propietario promedio quizá desconozca.
Rendimiento. Si instalas tú mismo el tapajuntas para techo, podrías causar, sin darte cuenta, daños en otras partes del sistema de techo. Si los componentes del sistema de techo no se reinstalan ni sellan correctamente después de colocar los tapajuntas, los materiales no garantizarán a la vivienda una protección adecuada frente a los daños ocasionados por el agua.
Consecuencias sobre la garantía. Muchos fabricantes de techado exigen que los trabajos realizados en el sistema de techo sean realizados por un contratista de techado profesional, acreditado o certificado por el propio fabricante del producto. Si intentas hacer el trabajo tú mismo, podrías anular la garantía del techo sin darte cuenta.
Instalación incorrecta. La colocación de tapajuntas en los salientes del techo o en las intersecciones entre planos del techo requiere precisión y una adecuada instalación de los materiales. Si no conoces los detalles de la instalación, tu vivienda corre el riesgo de sufrir filtraciones de agua y posibles daños en el interior.
Protege la inversión en tu vivienda con tapajuntas de calidad
Dado que el 95 % de las filtraciones en techos se originan en los puntos de unión entre penetraciones, salientes y planos, la manera más eficaz de proteger la vivienda contra la entrada de agua y sus daños es instalar tapajuntas para techo de máxima calidad, instalados por un contratista profesional.
Aunque la mayoría de los materiales de los tapajuntas tiene una vida útil que, en algunos casos, es más larga que la del propio techo, no debe subestimarse el papel que desempeñan en la protección de la vivienda. Esto significa que las inspecciones periódicas del techo y los tapajuntas deben formar parte del mantenimiento habitual de una vivienda.
Si te encuentras en la situación de tener que reemplazar tu techo, asegúrate de reemplazar también los materiales de los tapajuntas al mismo tiempo para garantizar la máxima protección de tu hogar.
¿Listo para que un profesional de confianza inspeccione tu tapajuntas o solucione una filtración? Busca un contratista de techado certificado por la fábrica de GAF en tu zona, listo para encargarse del trabajo.
*Los contratistas inscritos en los programas de certificación de GAF no son empleados ni agentes de GAF, y GAF no controla ni supervisa de otro modo estas empresas independientes. Los contratistas pueden recibir beneficios, como puntos y descuentos de recompensa por lealtad en herramientas de comercialización de GAF por participar en el programa y ofrecer a GAF garantías mejoradas, que requieren el uso de una cantidad mínima de productos de GAF. Tus tratos con un contratista, y cualquier servicio que te preste, están sujetos a los Términos de uso para contratistas.
