Ventilation Calculator
How to Calculate
Step 1: Measure
Measure the length and width of the attic floor space to be ventilated.
Step 2: Calculate
Enter the length and width or the total square footage of the attic floor space to be ventilated.
Step 3: Identify
See recommended quantities below for each GAF Ventilation Product (typically rounded up).
Let’s get started
Use this calculator to help determine the proper amount of attic ventilation based on U.S. FHA 1/300 guidelines.*
Suggestions for 900 sq. ft. Area
Numbers shown represent the recommended total number of units required for a single product.
384 Minimum Sq. In. of Net Free Area of
exhaust needed at or near the ridge.
And
384 Minimum Sq. In. of Net Free Area
of intake needed at or near the soffit.
Please Note:
Some local building codes require the 1/150 attic
ventilation rule, which increases the minimum attic ventilation needed. Always
consult local building code requirements in your area for details.
Note: N/R = not recommended
Exhaust Ventilation
| Product | Lineal Feet Required |
|---|---|
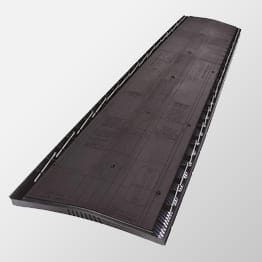
| Cobra® RidgeRunner® | 31' |
| Cobra® Rigid Vent 3™ | 22' |
| Cobra® SnowCountry® | 22' |
| Cobra® SnowCountry® Advanced | 22' |
| Cobra® Hip Vent | 43' |
| TruSlate® Ridge Vent | 43' |
Product
Cobra® RidgeRunner®
Lineal Feet Required
31'
Product
Cobra® Rigid Vent 3™
Lineal Feet Required
22'
Product
Cobra® SnowCountry®
Lineal Feet Required
22'
Product
Cobra® SnowCountry® Advanced
Lineal Feet Required
22'
Product
Cobra® Hip Vent
Lineal Feet Required
22'
Product
TruSlate® Ridge Vent
Lineal Feet Required
22'
| Product | Lineal Feet Required |
|---|---|
| Cobra® Exhaust Vent - Hand Nailable | 31' |
| Cobra® Exhaust Vent - Nail Gunnable | 22' |
Product
Cobra® Exhaust Vent - Hand Nailable
Lineal Feet Required
31'
Product
Cobra® Exhaust Vent - Nail Gunnable
Lineal Feet Required
22'
| Product | Lineal Feet Required |
|---|---|
| AR10 | 31' |
Product
AR10
Lineal Feet Required
31'
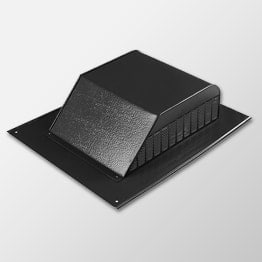
| Product | Number Required |
|---|---|
| RT65 Plastic Square - Top | 31 |
| IR61 Plastic Slant - Back | 31 |
| R50/RV50 Metal Utility | 31 |
| IR65 Plastic Slant - Back | 31 |
| SSB960 Metal Super Slant - Back | 31 |
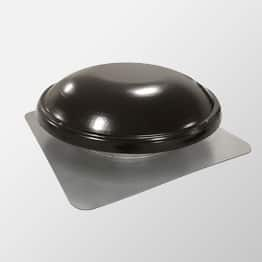
| HCD144 High-Capacity Dome Vent | 31 |
Product
RT65 Plastic Square - Top
Number Required
31
Product
IR61 Plastic Slant - Back
Number Required
31
Product
R50/RV50 Metal Utility
Number Required
31
Product
IR65 Plastic Slant - Back
Number Required
31
Product
SSB960 Metal Super Slant - Back
Number Required
31
Product
HCD144 High-Capacity Dome Vent
Number Required
31
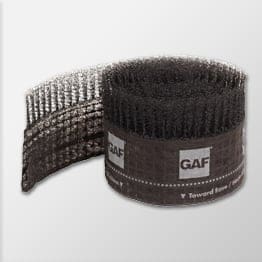
Intake Ventilation
| Product | Lineal Feet Required |
|---|---|
| Cobra IntakePro® | 31' |
Product
Cobra IntakePro®
Lineal Feet Required
31'
Product
Cobra® Fascia Vent (Mesh Roll) 1"
Lineal Feet Required
22'
Product
Cobra® Fascia Vent (Mesh Roll) 1.5"
Lineal Feet Required
22'
| Product | Number Required |
|---|---|
| LSV8 Metal Continuous Soffit Vents (Lineal Feet) | 31' |
| EAP 4x12 Plastic Soffit Vents | 31 |
| EAC 16x4 Metal Soffit Vents | 31 |
| EAC 16x8 Metal Soffit Vents | 31 |
| EmberShield® Closeable Soffit Vents | 31 |
Product
LSV8 Metal Continuous Soffit Vents
Number Required
31
Product
EAP 4x12 Plastic Soffit Vents
Number Required
22
Product
EAC 16x4 Metal Soffit Vents
Number Required
22
Product
EAC 16x8 Metal Soffit Vents
Number Required
22
Product
EmberShield® Closeable Soffit Vents
Number Required
22
Intake or Exhaust Ventilation
Note: Gable louvers are typically installed in pairs
| Product | Number Required |
|---|---|
| DA 12x12 | 31 |
| DA 12x18 | 31 |
| DA 14x24 | 31 |
| DA 18x24 | 31 |
| DA 24x30 | 31 |
Product
DA 12x12
Number Required
31
Product
DA 12x18
Number Required
31
Product
DA 14x24
Number Required
31
Product
DA 18x24
Number Required
32
Product
DA 24x30
Number Required
33
| Product | Number Required |
|---|---|
| SL 8x8 | 31 |
| SL 12x12 | 31 |
| SL 12x18 | 31 |
| SL 18x24 | 31 |
Product
SL 8x8
Number Required
34
Product
SL 12x12
Number Required
35
Product
SL 12x18
Number Required
36
Product
SL 14x24
Number Required
37
Product
SL 18x24
Number Required
38
| Product | Number Required |
|---|---|
| RLSC 2" | 31 |
| RLSC 3" | 31 |
| RLSC 4" | 31 |
Product
RLSC 2"
Number Required
39
Product
RLSC 3"
Number Required
40
Product
RLSC 4"
Number Required
41
Exhaust Ventilation
| Product | Number Required |
|---|---|
| ERV4 | 31 |
| ERV5 & Wi-Fi ERV5QCT | 22 |
| ERV6 | 22 |
| EZ Cool™ EZCR1 | 22 |
Product
ERV4
Number Required
31
Product
ERV5 & Wi-Fi ERV5QCT
Number Required
22
Product
ERV6
Number Required
31
Product
EZ Cool™ EZCR1
Number Required
31
| Product | Number Required |
|---|---|
| EGV5 & Wi-Fi EGV5QCT | 31 |
| EGV6 | 22 |
| EZ Cool™ EZCG1 | 22 |
Product
EGV5 & Wi-Fi EGV5QCT
Number Required
31
Product
EGV6
Number Required
31
Product
EZ Cool™ EZCG1
Number Required
31
| Product | Number Required |
|---|---|
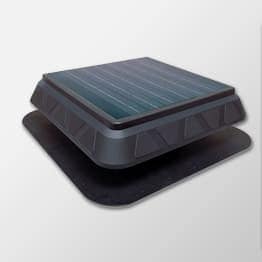
| Solar & Dual-Powered Roof (ERVSOLAR / ERVHYBRID) | 31 |
| Solar-Powered Gable (PGSOLAR) | 22 |
| High-Power Solar & Dual-Powered Roof (PRSOLAR2 / PRHYBRID2) | 22 |
Product
Solar & Dual-Powered Roof (ERVSOLAR / ERVHYBRID)
Number Required
31
Product
Solar-Powered Gable (PGSOLAR)
Number Required
31
Product
High-Power Solar & Dual-Powered Roof (PRSOLAR2 / PRHYBRID2)
Number Required
31
| Product | Number Required |
|---|---|
| 12" | 31 |
| 14" | 22 |
Product
12"
Number Required
31
Product
14"
Number Required
31
Intake Ventilation
| Product | Lineal Feet Required |
|---|---|
| with ERV4 | 31' |
| with ERV5 & Wi-Fi ERV5QCT | 22' |
| with ERV6 | 31' |
| with EZ Cool™ EZCR1 | 31' |
| with EGV5 & Wi-Fi EGV5QCT | 22' |
| with EGV6 | 31' |
| with EZ Cool™ EZCG1 | 31' |
| with Solar & Dual-Powered Roof | 22' |
| with Solar-Powered Gable | 22' |
| with High-Power Solar & Dual-Powered Roof | 22' |
| with 12" Wind Turbine | 22' |
| with 14" Wind Turbine | 22' |
Product
with ERV4
Lineal Feet Required
31'
Product
with ERV5 & Wi-Fi ERV5QCT
Lineal Feet Required
31'
Product
with ERV6
Lineal Feet Required
31'
Product
with EZ Cool™ EZCR1
Lineal Feet Required
31'
Product
with EGV5 & Wi-Fi EGV5QCT
Lineal Feet Required
31'
Product
with EGV6
Lineal Feet Required
31'
Product
with EZ Cool™ EZCG1
Lineal Feet Required
31'
Product
with Solar & Dual-Powered Roof
Lineal Feet Required
31'
Product
with Solar-Powered Gable
Lineal Feet Required
31'
Product
with High-Power Solar & Dual-Powered Roof
Lineal Feet Required
31'
Product
with 12" Wind Turbine
Lineal Feet Required
31'
Product
with 14" Wind Turbine
Lineal Feet Required
31'
| Product | Lineal Feet Required |
|---|---|
| with ERV4 | 31' |
| with ERV5 & Wi-Fi ERV5QCT | 22' |
| with ERV6 | 31' |
| with EZ Cool™ EZCR1 | 31' |
| with EGV5 & Wi-Fi EGV5QCT | 22' |
| with EGV6 | 31' |
| with EZ Cool™ EZCG1 | 31' |
| with Solar & Dual-Powered Roof | 22' |
| with Solar-Powered Gable | 22' |
| with High-Power Solar & Dual-Powered Roof | 22' |
| with 12" Wind Turbine | 22' |
| with 14" Wind Turbine | 22' |
Product
with ERV4
Lineal Feet Required
31'
Product
with ERV5 & Wi-Fi ERV5QCT
Lineal Feet Required
31'
Product
with ERV6
Lineal Feet Required
31'
Product
with EZ Cool™ EZCR1
Lineal Feet Required
31'
Product
with EGV5 & Wi-Fi EGV5QCT
Lineal Feet Required
31'
Product
with EGV6
Lineal Feet Required
31'
Product
with EZ Cool™ EZCG1
Lineal Feet Required
31'
Product
with Solar & Dual-Powered Roof
Lineal Feet Required
31'
Product
with Solar-Powered Gable
Lineal Feet Required
40'
Product
with High-Power Solar & Dual-Powered Roof
Lineal Feet Required
31'
Product
with 12" Wind Turbine
Lineal Feet Required
31'
Product
with 14" Wind Turbine
Lineal Feet Required
31'
| Product | Number Required |
|---|---|
| with ERV4 | 31 |
| with ERV5 & Wi-Fi ERV5QCT | 22 |
| with ERV6 | 31 |
| with EZ Cool™ EZCR1 | 31 |
| with EGV5 & Wi-Fi EGV5QCT | 22 |
| with EGV6 | 31 |
| with EZ Cool™ EZCG1 | 31 |
| with Solar & Dual-Powered Roof | 22 |
| with Solar-Powered Gable | 22 |
| with High-Power Solar & Dual-Powered Roof | 22 |
| with 12" Wind Turbine | 22 |
| with 14" Wind Turbine | 22 |
Product
with ERV4
Number Required
31
Product
with ERV5 & Wi-Fi ERV5QCT
Number Required
31
Product
with ERV6
Number Required
31
Product
with EZ Cool™ EZCR1
Number Required
31
Product
with EGV5 & Wi-Fi EGV5QCT
Number Required
31
Product
with EGV6
Number Required
31
Product
with EZ Cool™ EZCG1
Number Required
31
Product
with Solar & Dual-Powered Roof
Number Required
31
Product
with Solar-Powered Gable
Number Required
49
Product
with High-Power Solar & Dual-Powered Roof
Number Required
31
Product
with 12" Wind Turbine
Number Required
31
Product
with 14" Wind Turbine
Number Required
31
| Product | Number Required |
|---|---|
| with ERV4 | 31 |
| with ERV5 & Wi-Fi ERV5QCT | 22 |
| with ERV6 | 31 |
| with EZ Cool™ EZCR1 | 31 |
| with EGV5 & Wi-Fi EGV5QCT | 22 |
| with EGV6 | 31 |
| with EZ Cool™ EZCG1 | 31 |
| with Solar & Dual-Powered Roof | 22 |
| with Solar-Powered Gable | 22 |
| with High-Power Solar & Dual-Powered Roof | 22 |
| with 12" Wind Turbine | 22 |
| with 14" Wind Turbine | 22 |
Product
with ERV4
Number Required
31
Product
with ERV5 & Wi-Fi ERV5QCT
Number Required
31
Product
with ERV6
Number Required
31
Product
with EZ Cool™ EZCR1
Number Required
31
Product
with EGV5 & Wi-Fi EGV5QCT
Number Required
31
Product
with EGV6
Number Required
31
Product
with EZ Cool™ EZCG1
Number Required
31
Product
with Solar & Dual-Powered Roof
Number Required
31
Product
with Solar-Powered Gable
Number Required
58
Product
with High-Power Solar & Dual-Powered Roof
Number Required
31
Product
with 12" Wind Turbine
Number Required
31
Product
with 14" Wind Turbine
Number Required
31
| Product | Number Required |
|---|---|
| with ERV4 | 31 |
| with ERV5 & Wi-Fi ERV5QCT | 22 |
| with ERV6 | 31 |
| with EZ Cool™ EZCR1 | 31 |
| with EGV5 & Wi-Fi EGV5QCT | 22 |
| with EGV6 | 31 |
| with EZ Cool™ EZCG1 | 31 |
| with Solar & Dual-Powered Roof | 22 |
| with Solar-Powered Gable | 22 |
| with High-Power Solar & Dual-Powered Roof | 22 |
| with 12" Wind Turbine | 22 |
| with 14" Wind Turbine | 22 |
Product
with ERV4
Number Required
31
Product
with ERV5 & Wi-Fi ERV5QCT
Number Required
31
with ERV6
Number Required
31
with EZ Cool™ EZCR1
Number Required
31
with EGV5 & Wi-Fi EGV5QCT
Number Required
31
with EZ Cool™ EZCG1
Number Required
31
with Solar & Dual-Powered Roof
Number Required
31
with Solar-Powered Gable
Number Required
67
with High-Power Solar & Dual-Powered Roof
Number Required
31
with 12" Wind Turbine
Number Required
31
with 14" Wind Turbine
Number Required
31
| Product | Number Required |
|---|---|
| with ERV4 | 31 |
| with ERV5 & Wi-Fi ERV5QCT | 22 |
| with ERV6 | 31 |
| with EZ Cool™ EZCR1 | 31 |
| with EGV5 & Wi-Fi EGV5QCT | 22 |
| with EGV6 | 31 |
| with EZ Cool™ EZCG1 | 31 |
| with Solar & Dual-Powered Roof | 22 |
| with Solar-Powered Gable | 22 |
| with High-Power Solar & Dual-Powered Roof | 22 |
| with 12" Wind Turbine | 22 |
| with 14" Wind Turbine | 22 |
Product
with ERV4
Number Required
31
Product
with ERV5 & Wi-Fi ERV5QCT
Number Required
31
Product
with ERV6
Number Required
31
Product
with EZ Cool™ EZCR1
Number Required
31
Product
with EGV5 & Wi-Fi EGV5QCT
Number Required
31
Product
with EGV6
Number Required
31
Product
with EZ Cool™ EZCG1
Number Required
31
Product
with Solar & Dual-Powered Roof
Number Required
31
Product
with Solar-Powered Gable
Number Required
75
Product
with High-Power Solar & Dual-Powered Roof
Number Required
31
Product
with 12" Wind Turbine
Number Required
31
Product
with 14" Wind Turbine
Number Required
31
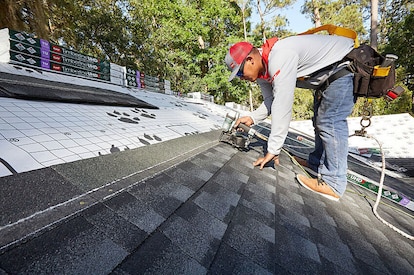
Attic ventilation & vent products
To find the right attic ventilation solution for your roofing project, choose from a complete line of ridge and hip vents, electric and solar power vents, roof and gable louvers, wind turbines, intake vents, and more, all from GAF.
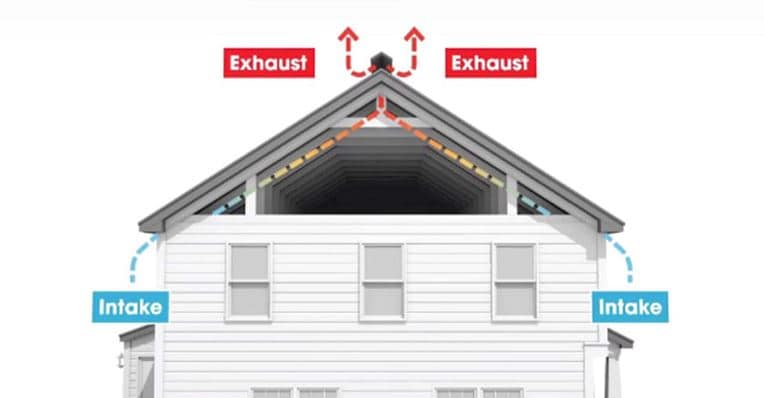
The 1/300 balanced attic ventilation rule
Proper attic ventilation consists of a balance between air intake (at or near your soffits) and air exhaust (at or near your roof ridge). The U.S. Federal Housing authority recommends a minimum of 1 square foot of attic ventilation (evenly split between intake and exhaust) for every 300 square feet of attic floor space. Always have a balanced ventilation system. In no case should the amount of exhaust ventilation exceed the amount of intake ventilation.
*Note: The 1/300 rule is a general rule and does not apply to all situations. Local building codes, when stricter, take precedence. Always consult a design professional for cathedral ceilings, insulated roof decks, etc.
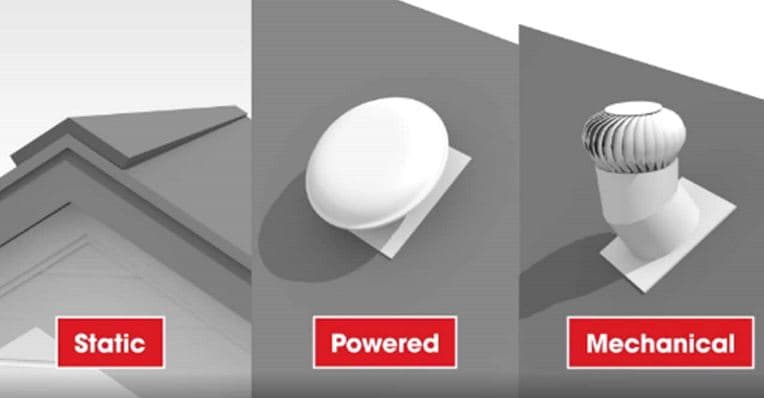
Learn about attic vent options
Are you confused about the many attic ventilation solutions available? Curious why one roof would get ridge ventilation and another would incorporate power vents or a roof louver? Watch this video for a great introduction to the art and science of choosing the right attic ventilation components for your roof.
Your top attic ventilation questions answered
.jpg?as=0&w=360&hash=96E57420C6E1572DE2D4BC3C4C5A145D)
How to Ventilate an Attic - How Attic Ventilation Works | GAF Roofing
What is attic ventilation? Learn how attics are ventilated.

How to Select Products for Your Attic Ventilation System | GAF Roofing
Determine which ventilation products are best for your roofing project.

How to Plan a Balanced Attic Ventilation System | GAF Roofing Materials
In this video, you will learn how to calculate a balanced attic ventilation system.
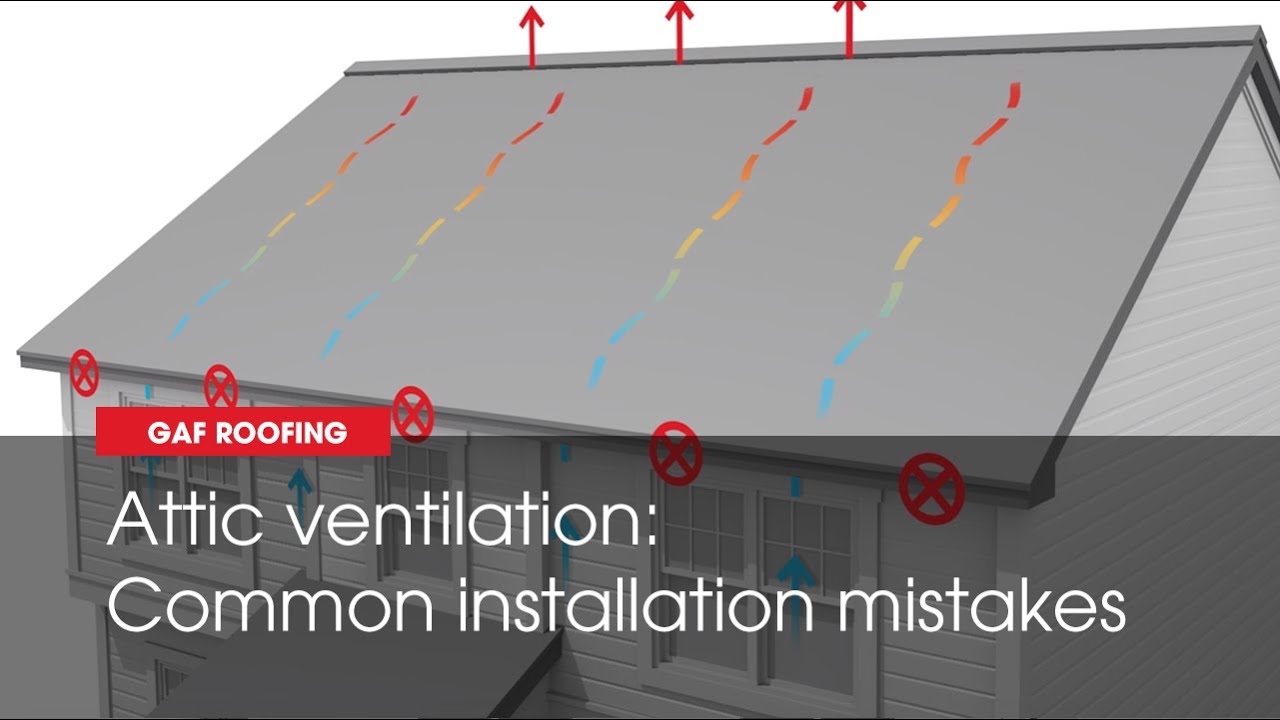
How to Avoid Common Attic Ventilation Installation Mistakes | GAF Roofing
When planning and installing a balanced attic ventilation system, it is important to understand and avoid these common mistakes that may reduce the effectiveness of the system.
Related Articles